Guild: How to import items and give to your users
In this section:
- How to import your assets (that you bought on the Nefta platform) into your Metamask wallet.
- How to import your assets (that the game has gifted your metamask wallet) into the Nefta platform.
- How to rent assets to your scholars/wallets.
- How to revoke access to an asset from a scholar/wallet.
- (In the next section, we talk about the technical details).
Note: We are assuming you already have a Nefta account.
Import assets from the Nefta marketplace to you Metamask wallet
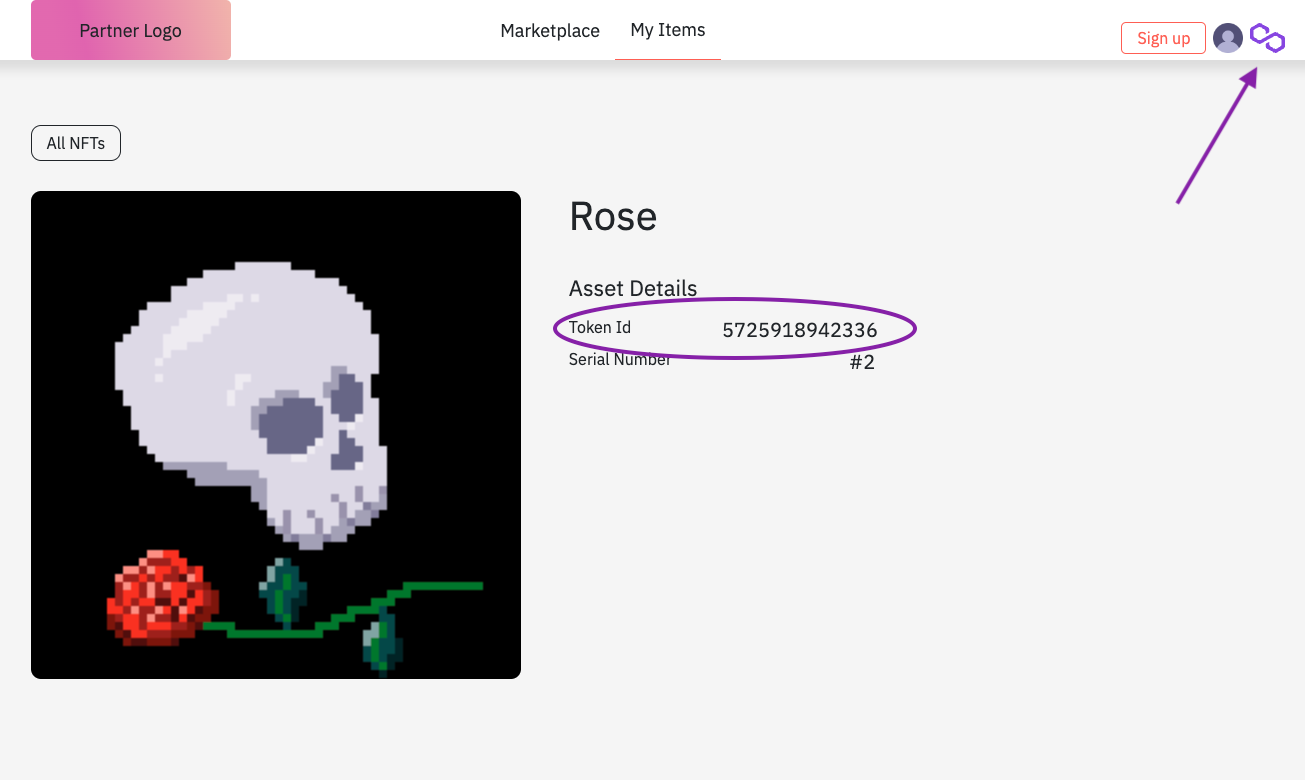
- Copy your NFT’s Contract Address from the blockchain explorer (you can get it by clicking the coin image on top right corner of our page).
- Copy your NFT’s Token ID from our marketplace. Go to my items and click on the NFT you would like to import.
- Sign in to your Metamask wallet. Make sure the wallet you're using is the one that owns the NFT, otherwise this won't work.
- If you are using your PC I suggest opening the 'expand view' of your metamask wallet. Since you need to copy and paste 2 different IDs (the extension will close if you click out of it and you will lose your progress).
- Then go to the NFT's tab and click on the 'Import NFT' button. A popup will show up where you can paste the contract address and your token ID. Click on the import button and your NFT will show up on your list
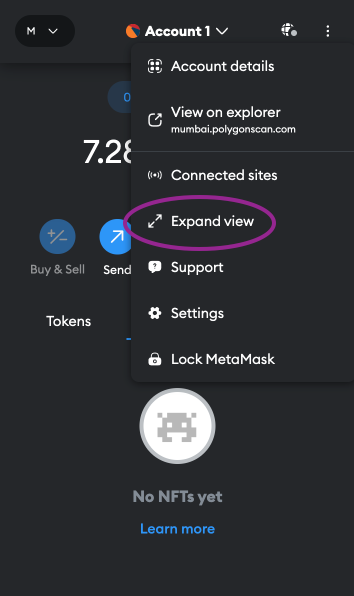
Click on expand view
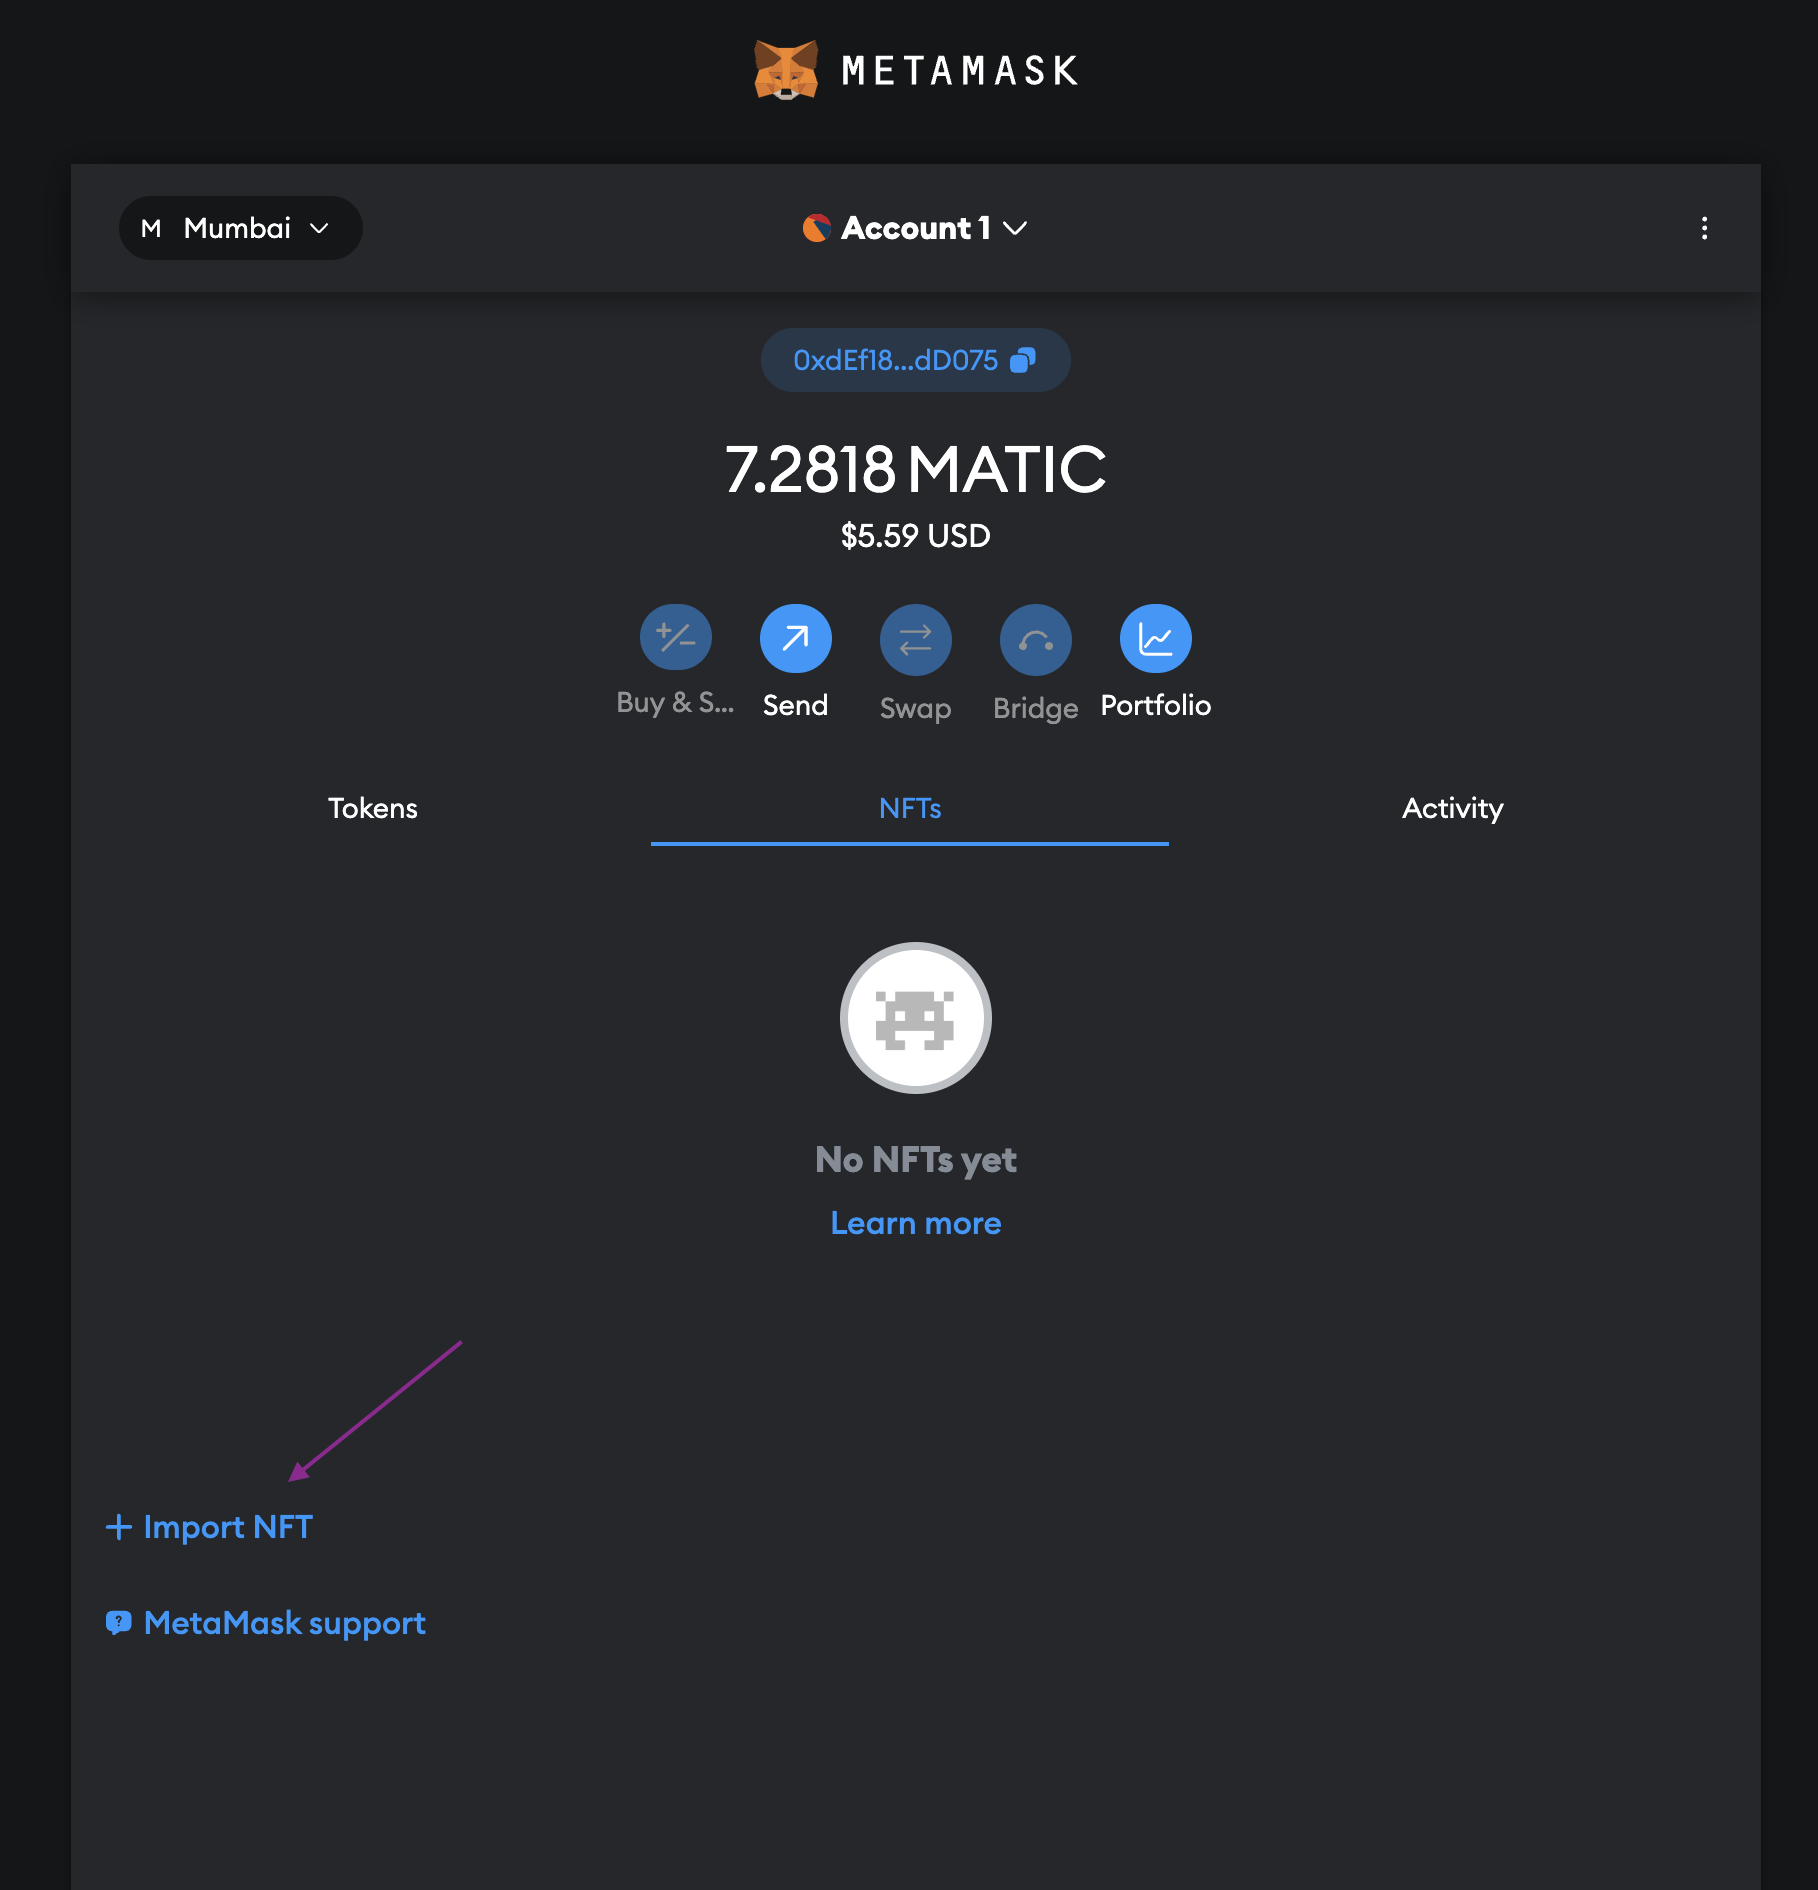
click on import NFT
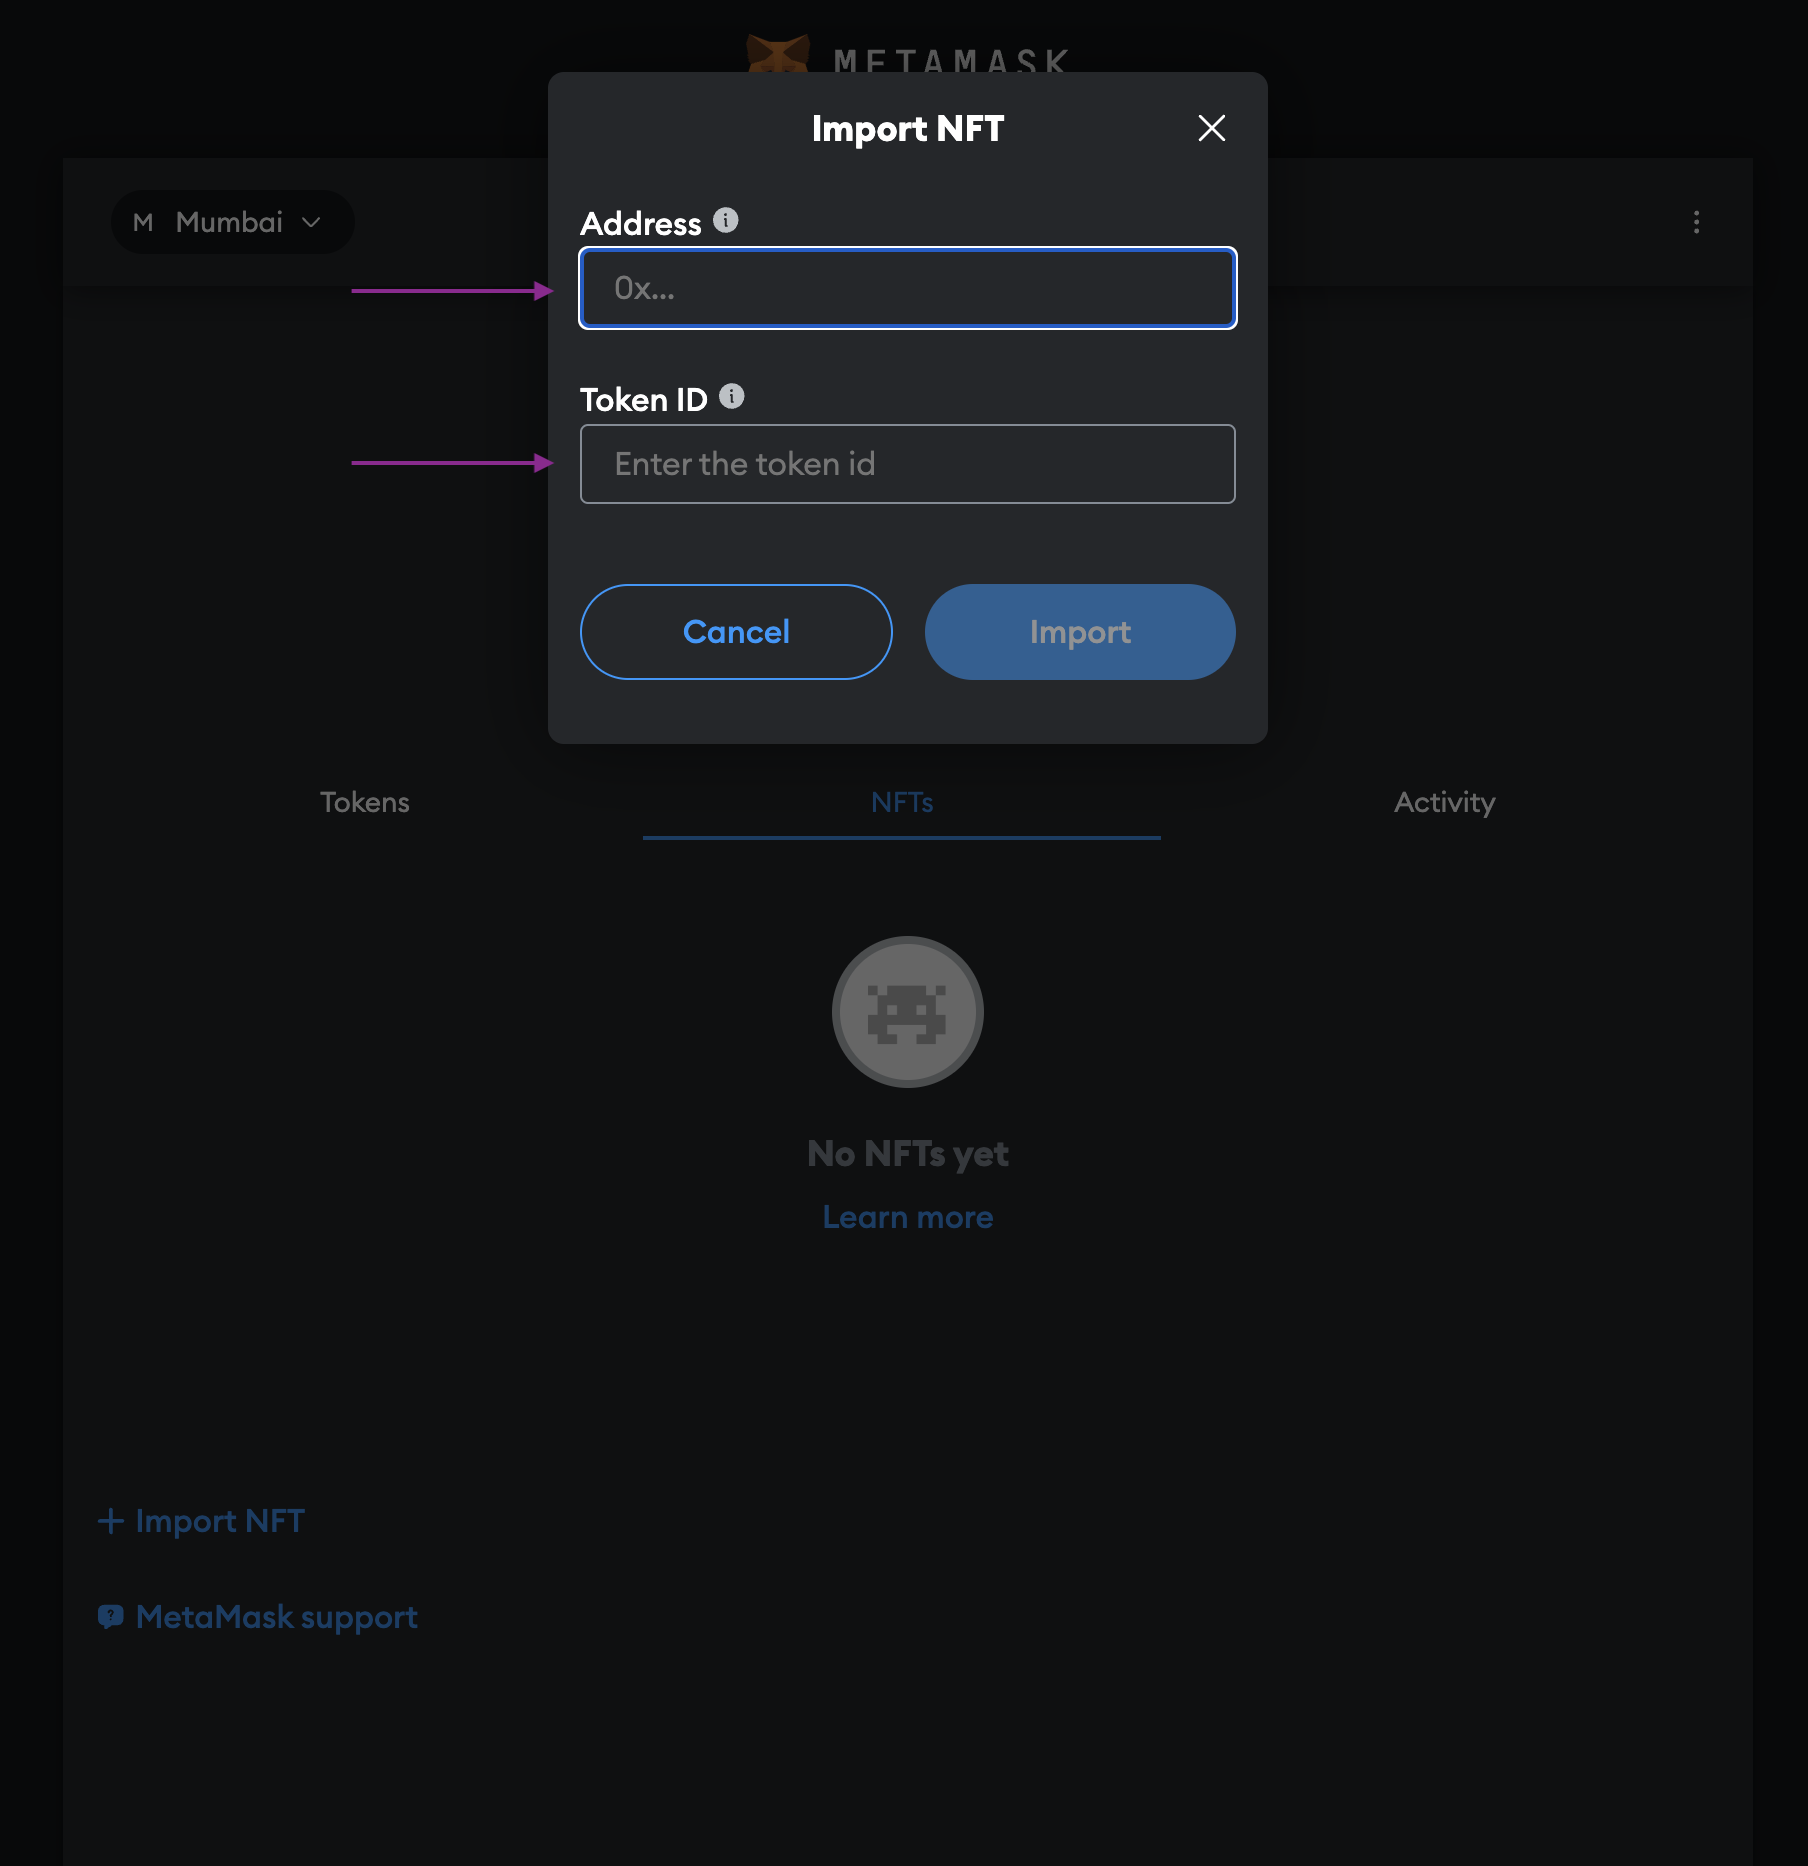
Paste the contract address and token ID and click import
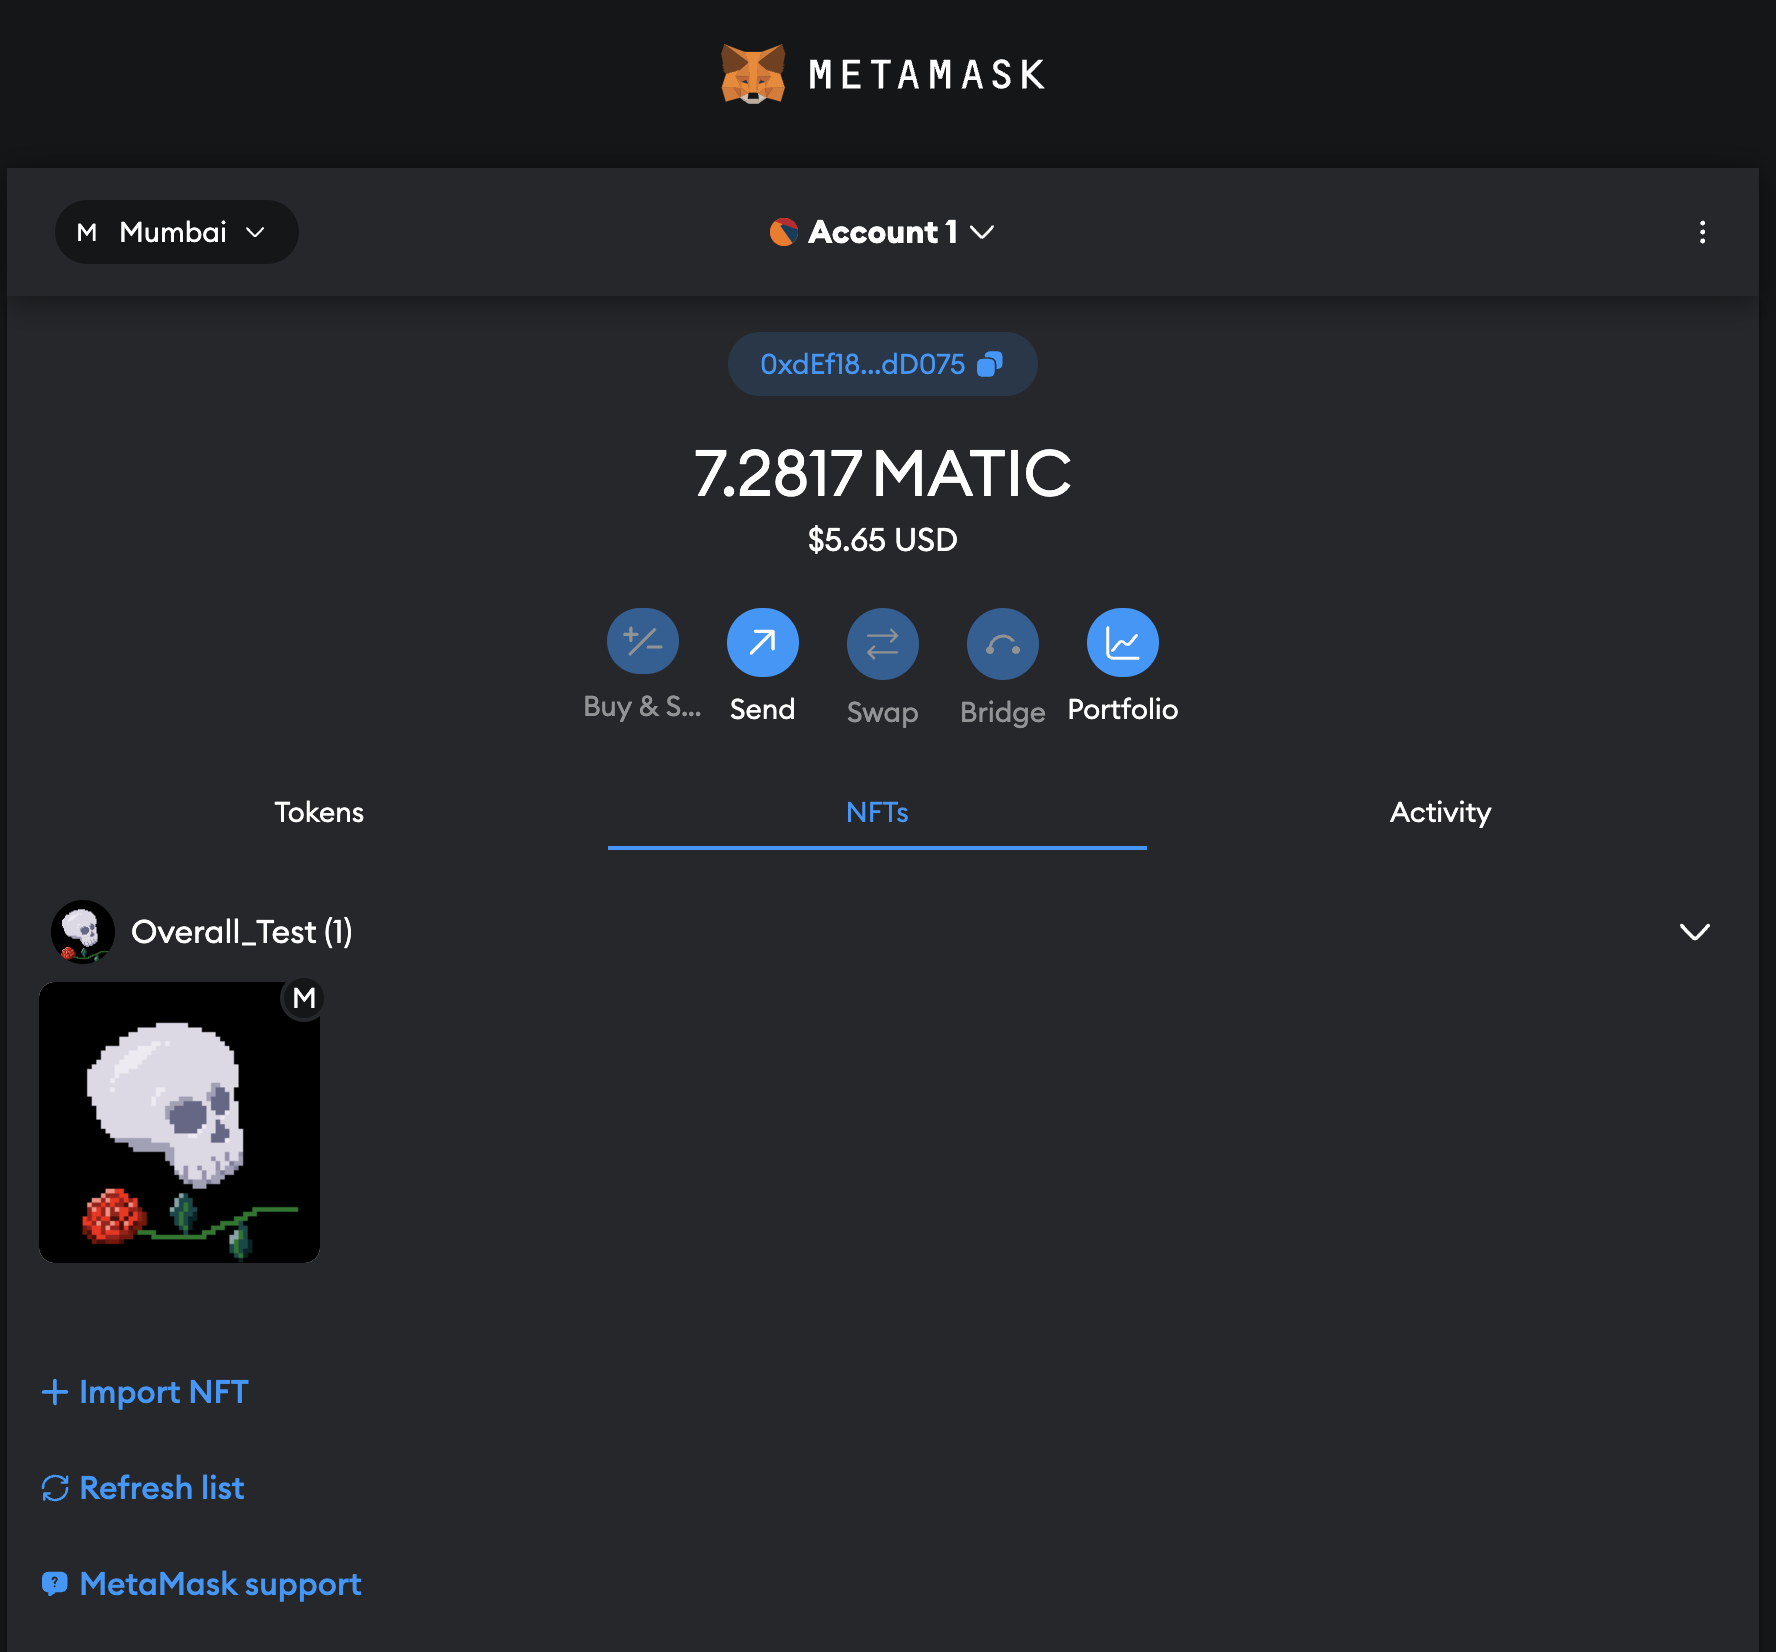
Your NFT should show up in your list
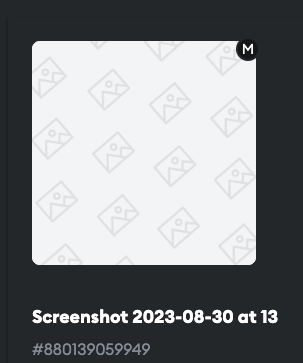
Possible error: placeholder image
There is a chance that instead of your image Metamask will show you a placeholder image. If this happens go to Metamask settings. Search for "autodetect NFT's" and turn it on (as of writing this you can find it under 'Security & privacy').
Import assets from Metamask to Nefta platform
Firstly, navigate to Digital Assets on the left-hand nav.
Next, in the top right corner, click Import.
Lastly, click "Metamask" in the middle of the screen.
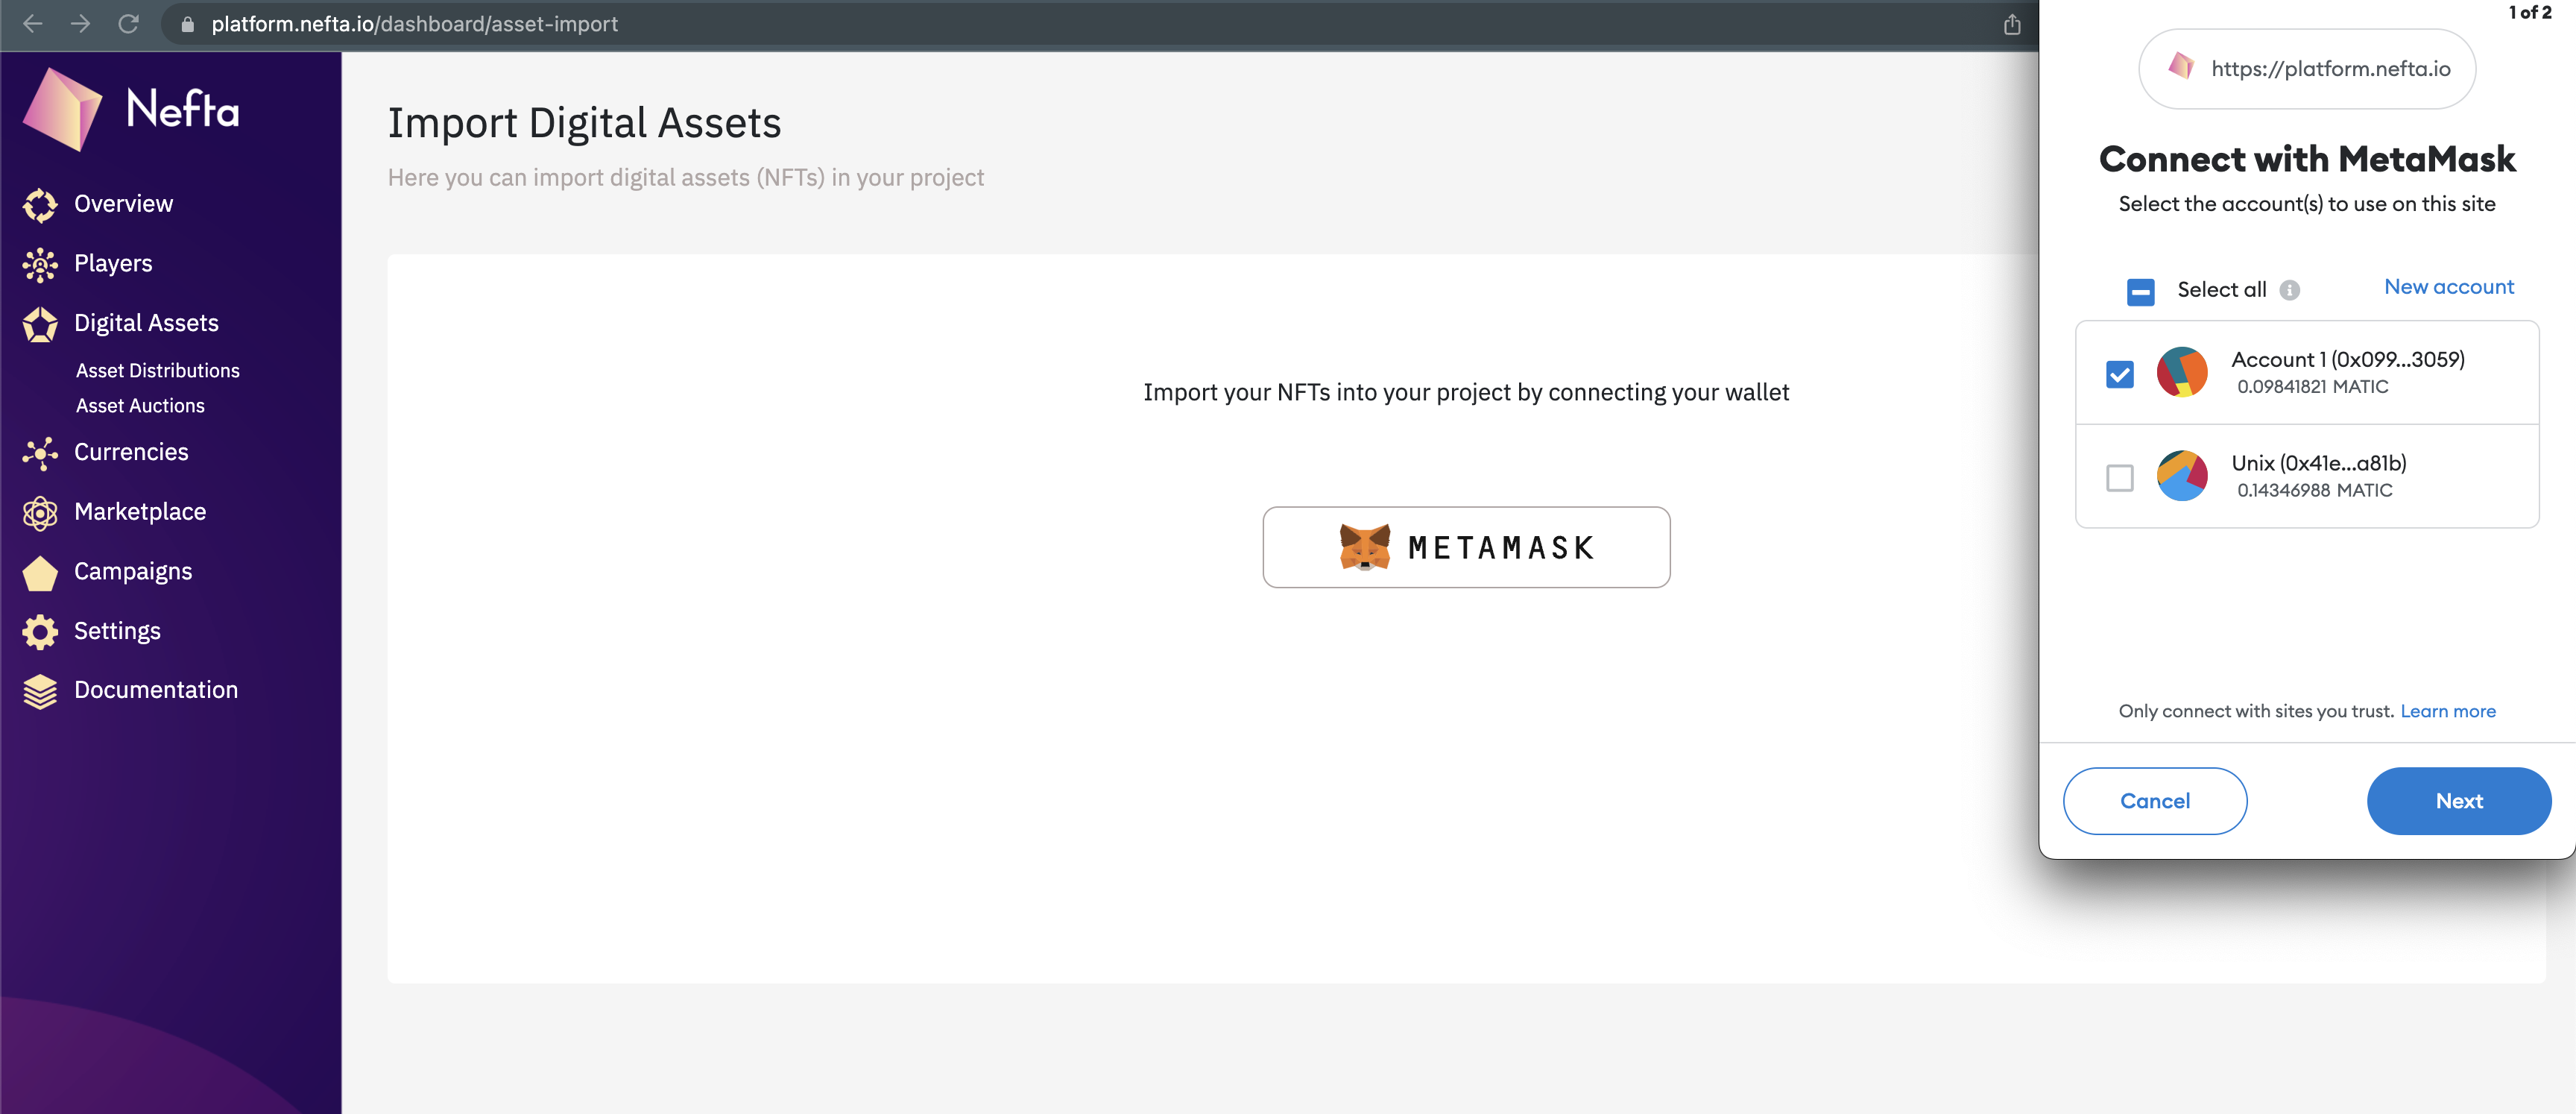
Import
Our platform will automatically import all of the assets that were gifted to you from the game.
Note:
We will only import assets that have been gifted to you from the game, via the Nefta platform, to your Metamask wallet.
Rent your assets
Campaign page
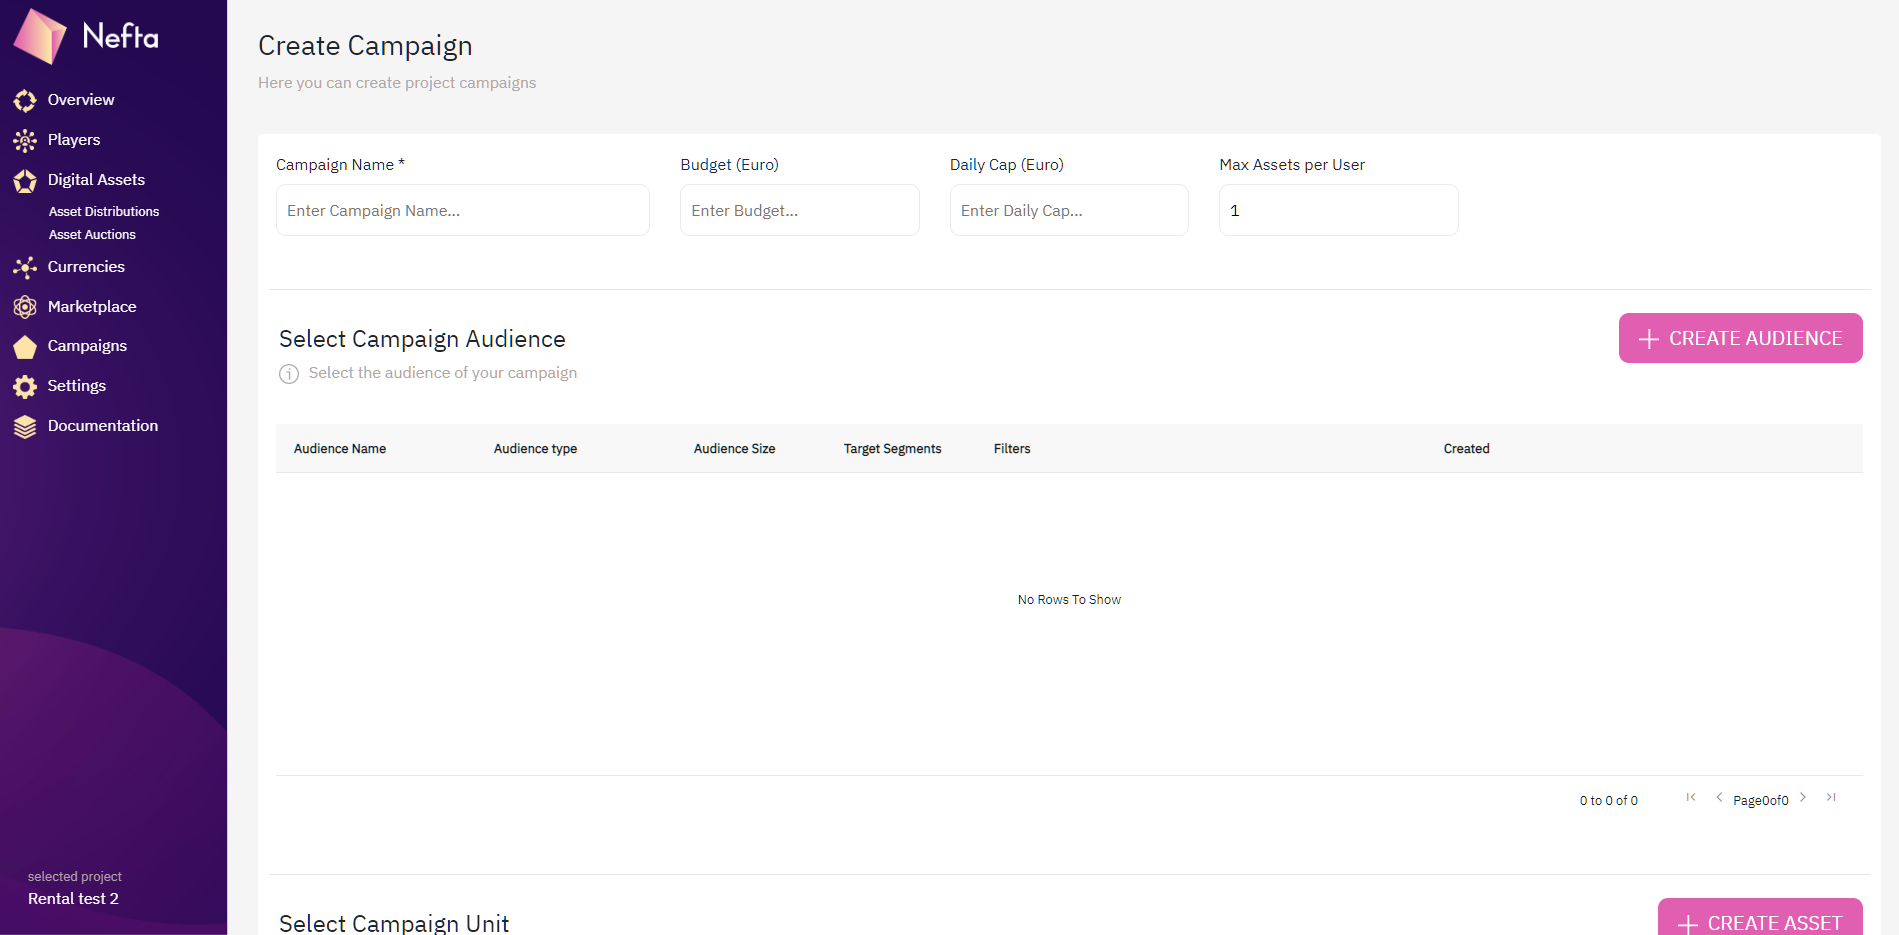
Create campaigns
Go to campaigns (found in the left-hand navigation).
Click "Create" in the top right-hand corner.
Give your campaign a name.
The budget is to pay your gas fee when renting an asset for the first time (minting the asset).
Max Assets per User sets the maximum number of assets that a user can rent. Do you want to limit the number of assets that can be rented to each wallet address from this campaign?
Create a list to rent to
Choose an audience you created before, or click create an audience if this is your first time.
- Name your audience
- Upload your wallets (simply copy and paste each on a new line)
- Click "Create Audience" in the bottom right
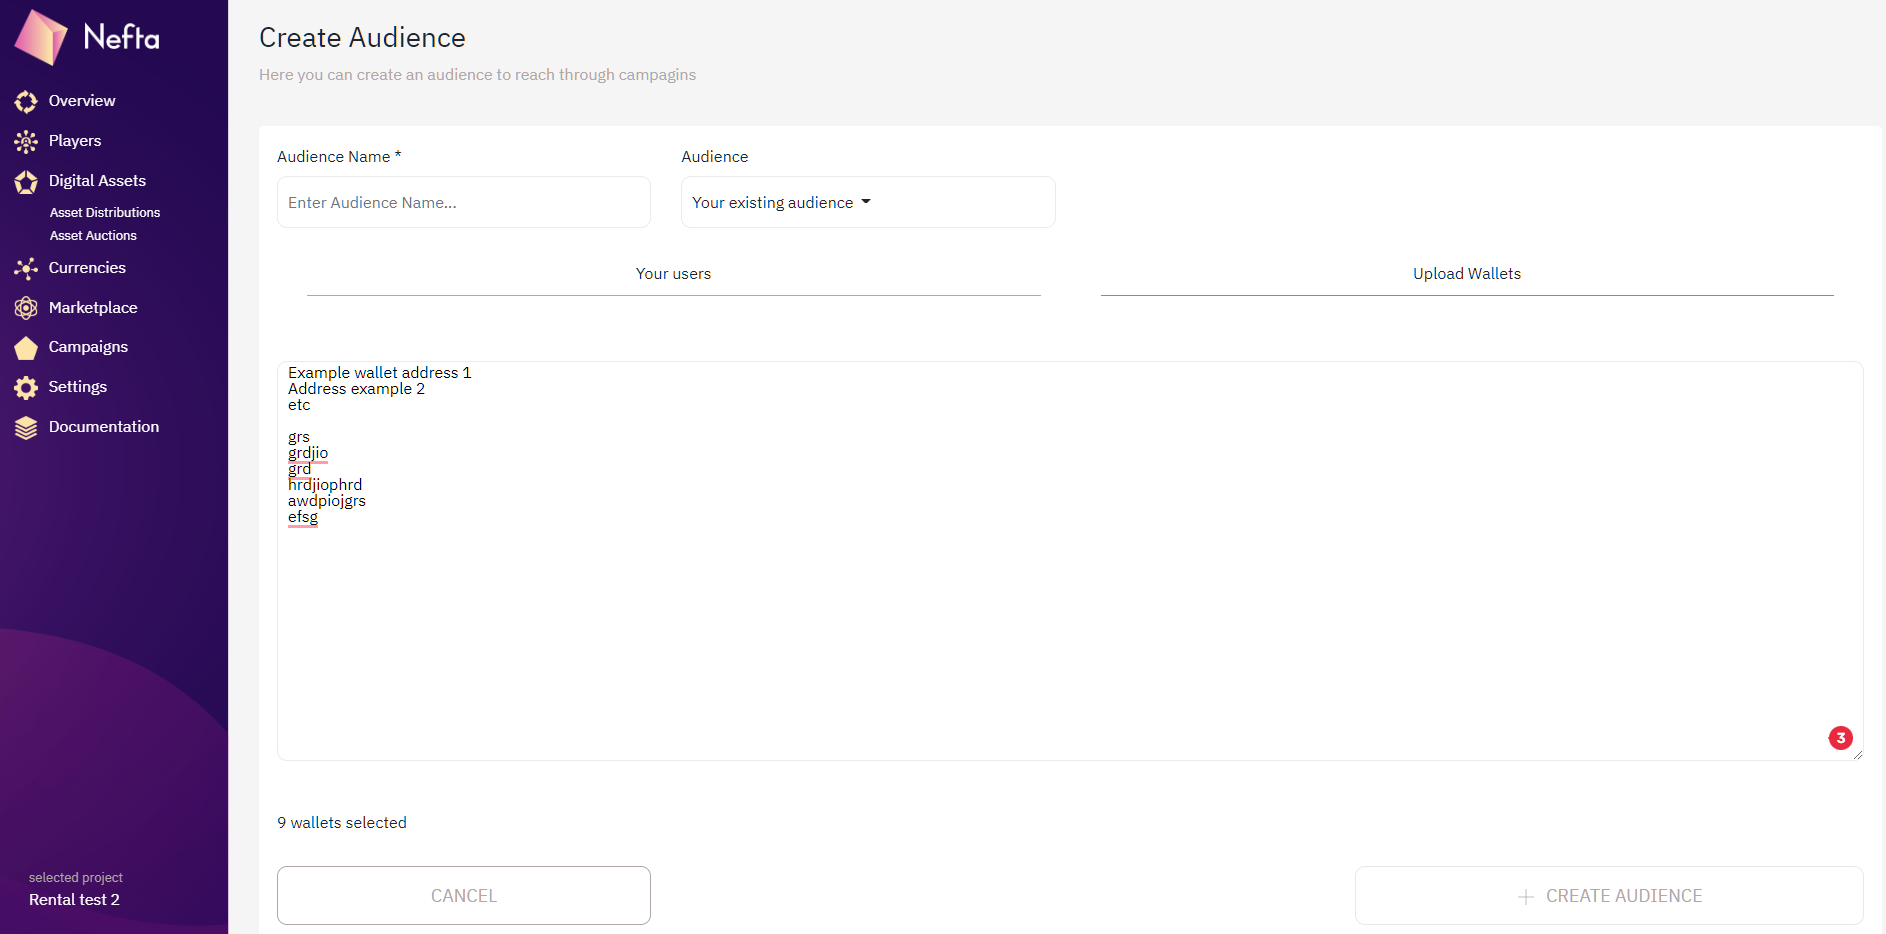
Create an audience
Select assets for rental
Simply click the checkbox next to the asset you want to rent.
That's it - all good to go.
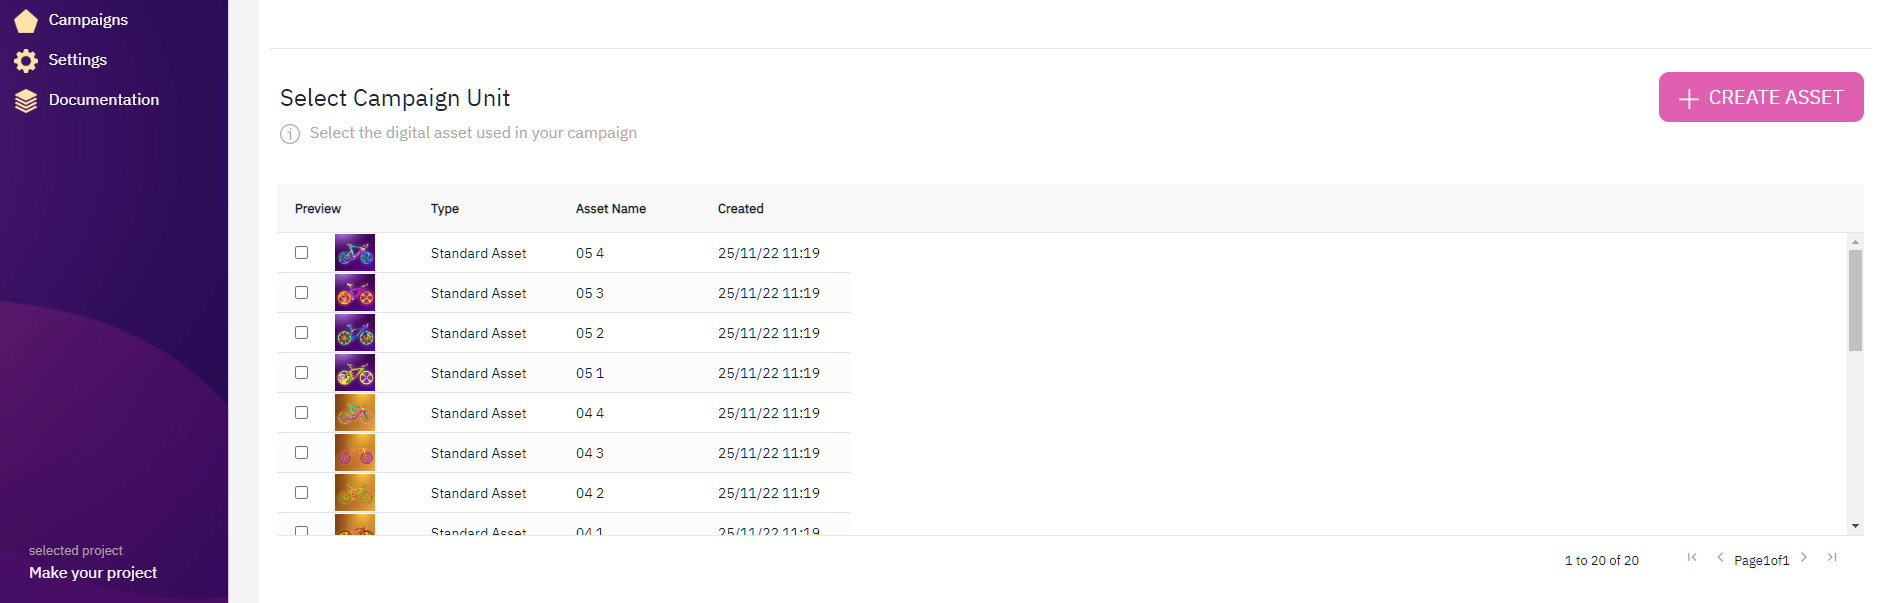
Select assets
Important: Double check
Before you hit "Create Campaign" and start, take a moment to review your campaign!
- Campaign name
- Budget
- Audience
- Asset to rent
- Ensure that "Bulk Renting" is selected at the very end of the page.
Go Live
Once happy with all the settings, hit Create Campaign to start.
Success!
Your campaign will go live, and your assets will be rented to the wallet addresses you specified in your audience.
The next step covers how to manage NFT rentals, including revoking access.
Updated 9 months ago