Testing Nefta
There are two ways that you can test out our tools.
- internal_testnet - our internal test environment, that is off chain, for you to experiment with our tools.
- Testnet - the actual testnet for the chain you have selected.
After the testnet, you move to production, which is the live environment on a live blockchain.
Testing Nefta - internal_testnet
When setting up your project, simply choose "Internal Test Blockchain".
That's it, no more setup is required.

Testing Nefta - TESTNET
In this section you will learn how to test the Nefta platform using the blockchain testnet.
- Test our features,
- Creating a testnet project
- Selecting your project environment
- Funding your project with test tokens
What is a testnet?
A testnet is an instance of a blockchain powered by the same or a newer version of the underlying software and its intended testing purposes.
It's a risk-free way to experiment and see what you can do on a blockchain network with the advantage of having no costs or risk. You are able to see all of the outputs exactly the same as if you were on a live production environment on that blockchain.
If you can get your concept to work in your game and on the testnet, then it will also function properly when it is deployed to production.
How to test the Nefta platform with testnet
1. Creating a testnet project
Click "Overview" and then "New Project" in the top right corner of the Nefta platform.
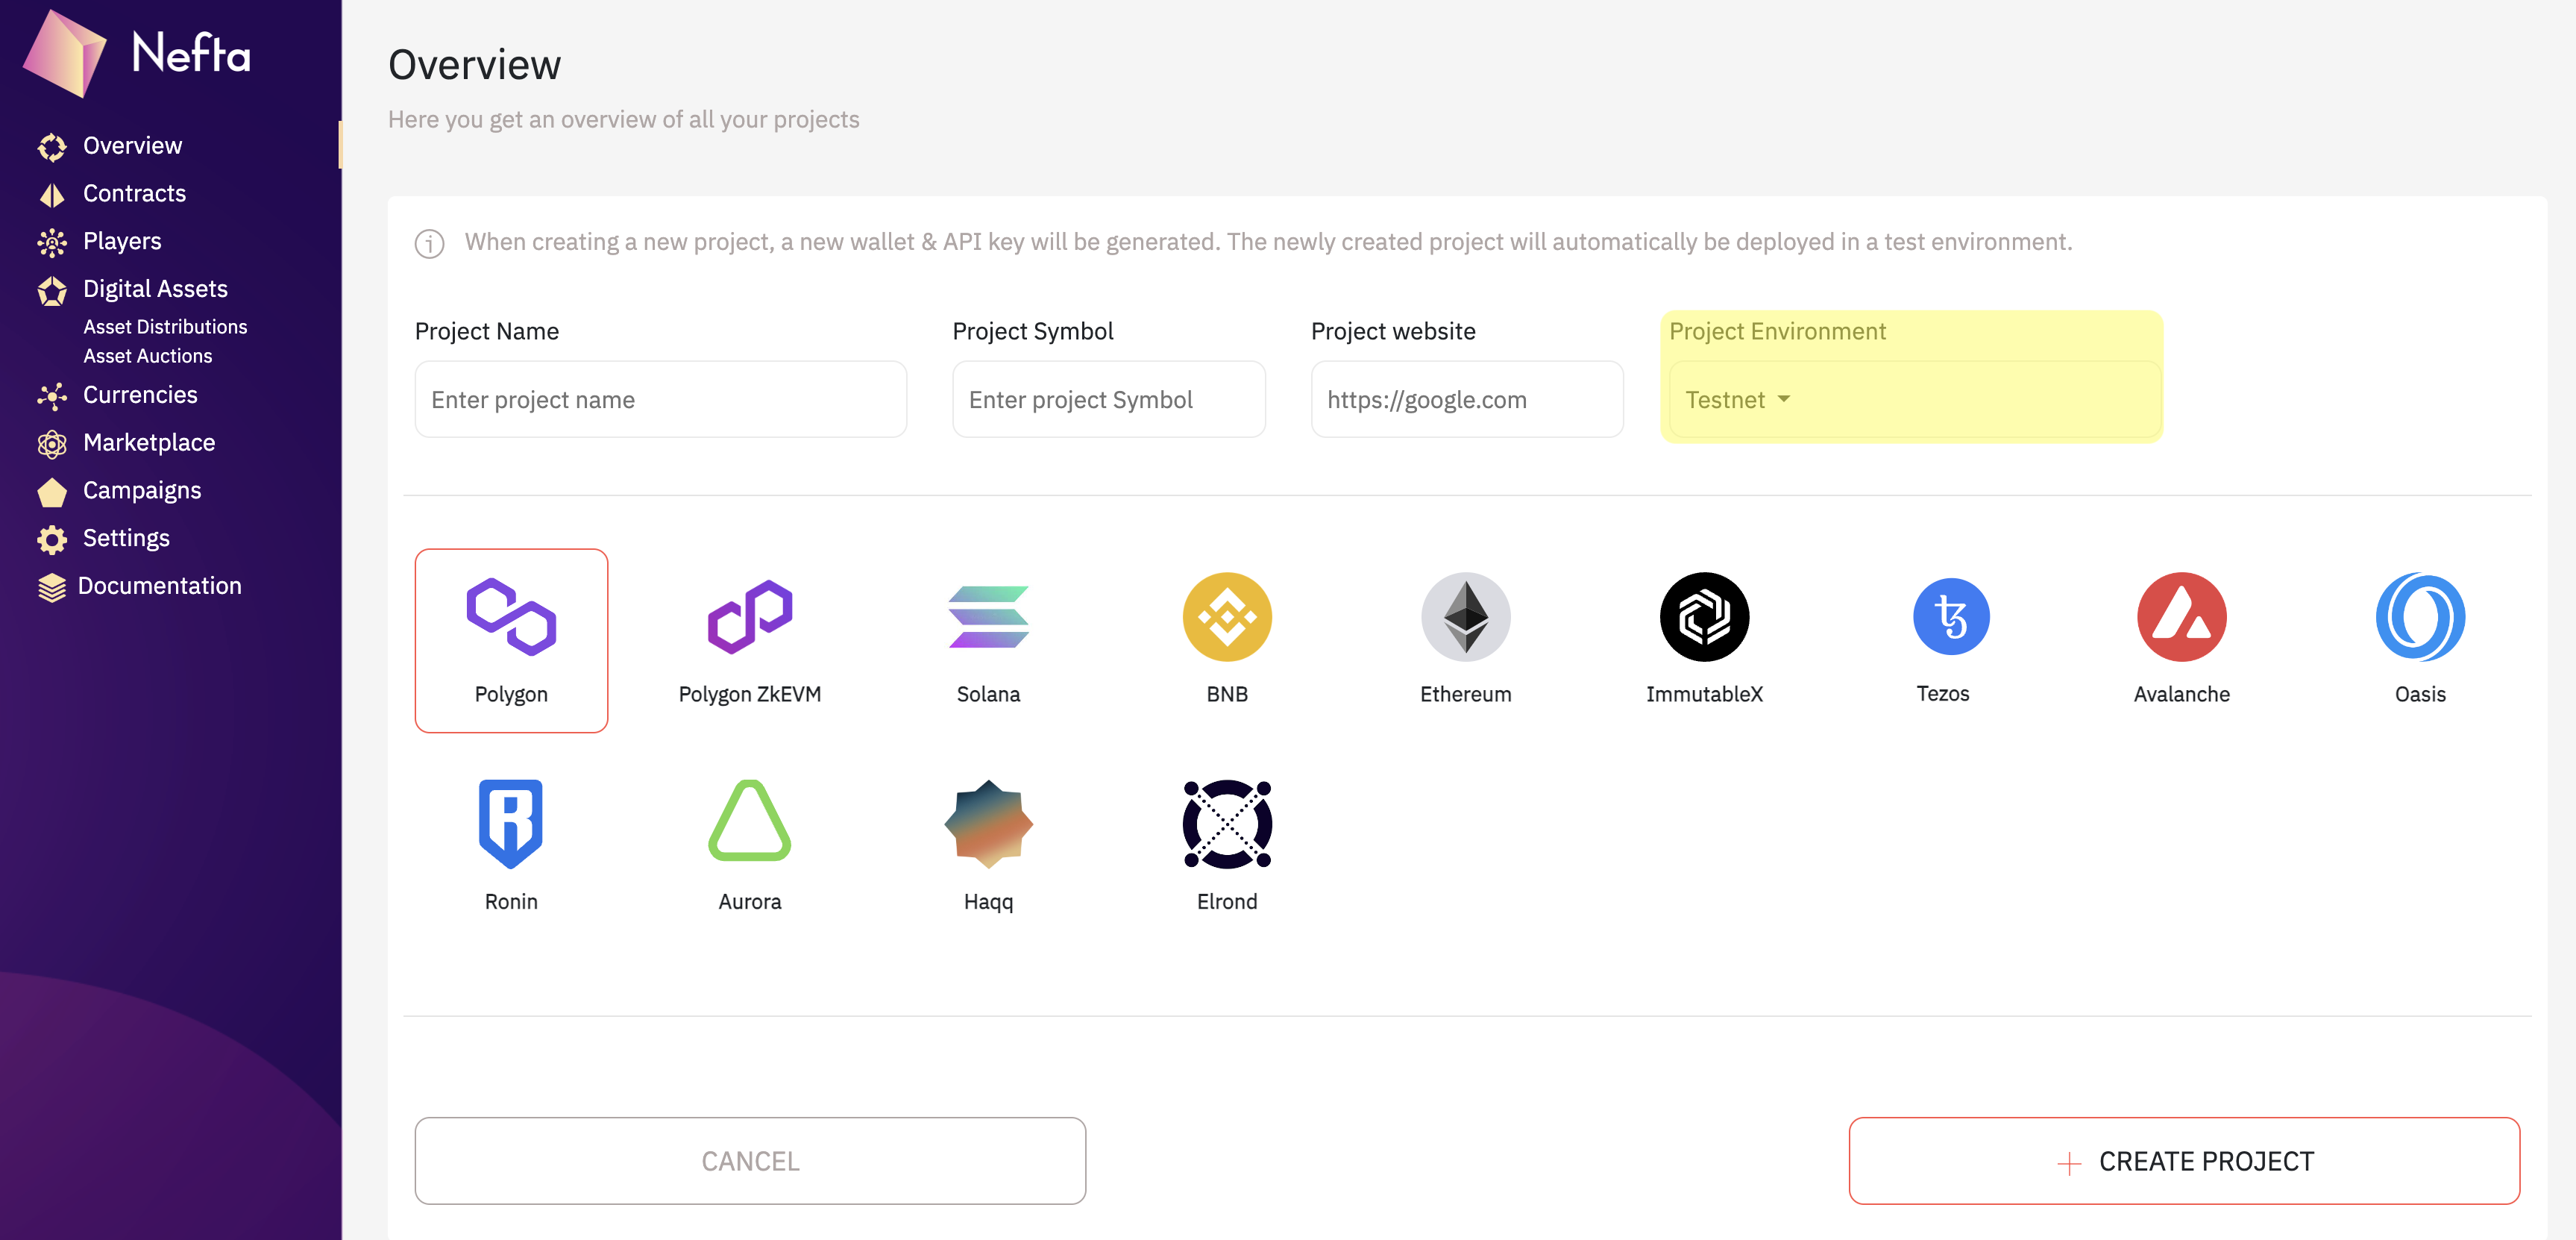
2. Selecting your project environment
Good to know...
There are two options for testing!
Testnet
The testnet from the chain you have selected.
Deploys to the blockchain's testnet environment and allows you to confirm that the blockchain and your game are communicating and behaving as intended.
Internal Test Blockchain
The Nefta internal test chain.
It does not deploy to the testnet or production environments on a blockchain and allows you to practice and test whether the APIs, SDK, and game systems are working properly. With this method, it is not possible to check whether Nefta, your project, and the blockchain are functioning as intended.
3. Funding your project with test tokens
Why do I need to fund my project with Test Tokens?
Testnet is an actual version of a blockchain (the test version). Putting your project on the chain and minting test assets will cost your project wallet gas. As a result, you will need to fund the wallet of the project that you just created in order for the testnet to charge gas fees.
Test tokens are used to fund wallets and projects on testnet, so that you don't spend real money trying out the real infrastructure in the production environment.
How to fund your project with Test Tokens.
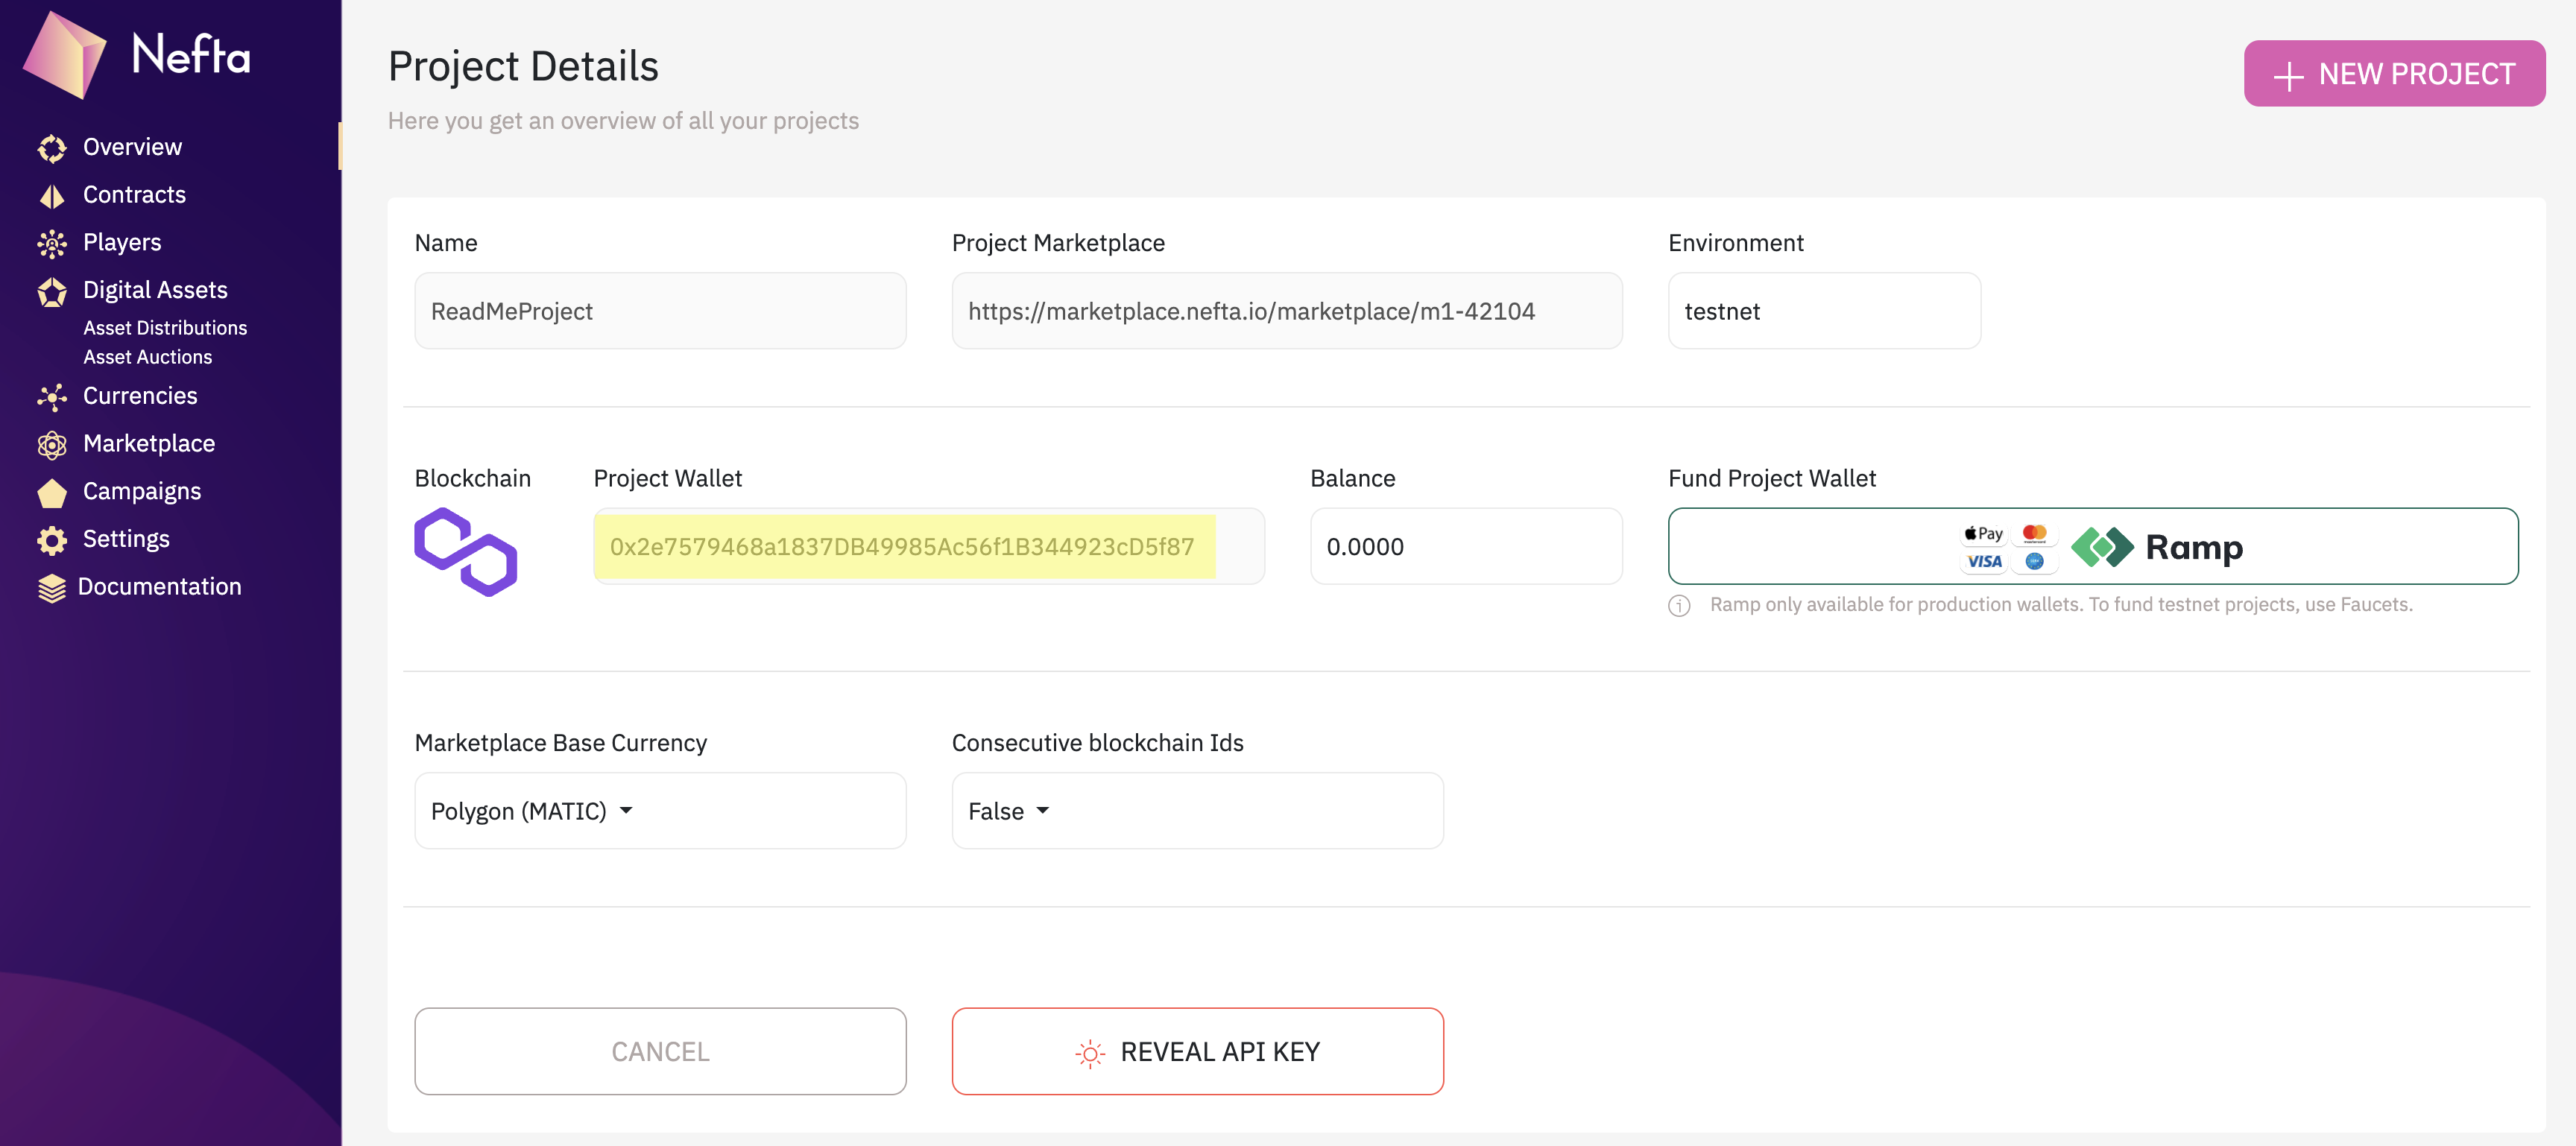
Step 1: Get your project wallet
Go to the Nefta platform > Overview > click "Details" on your new project.
Copy your project wallet address.
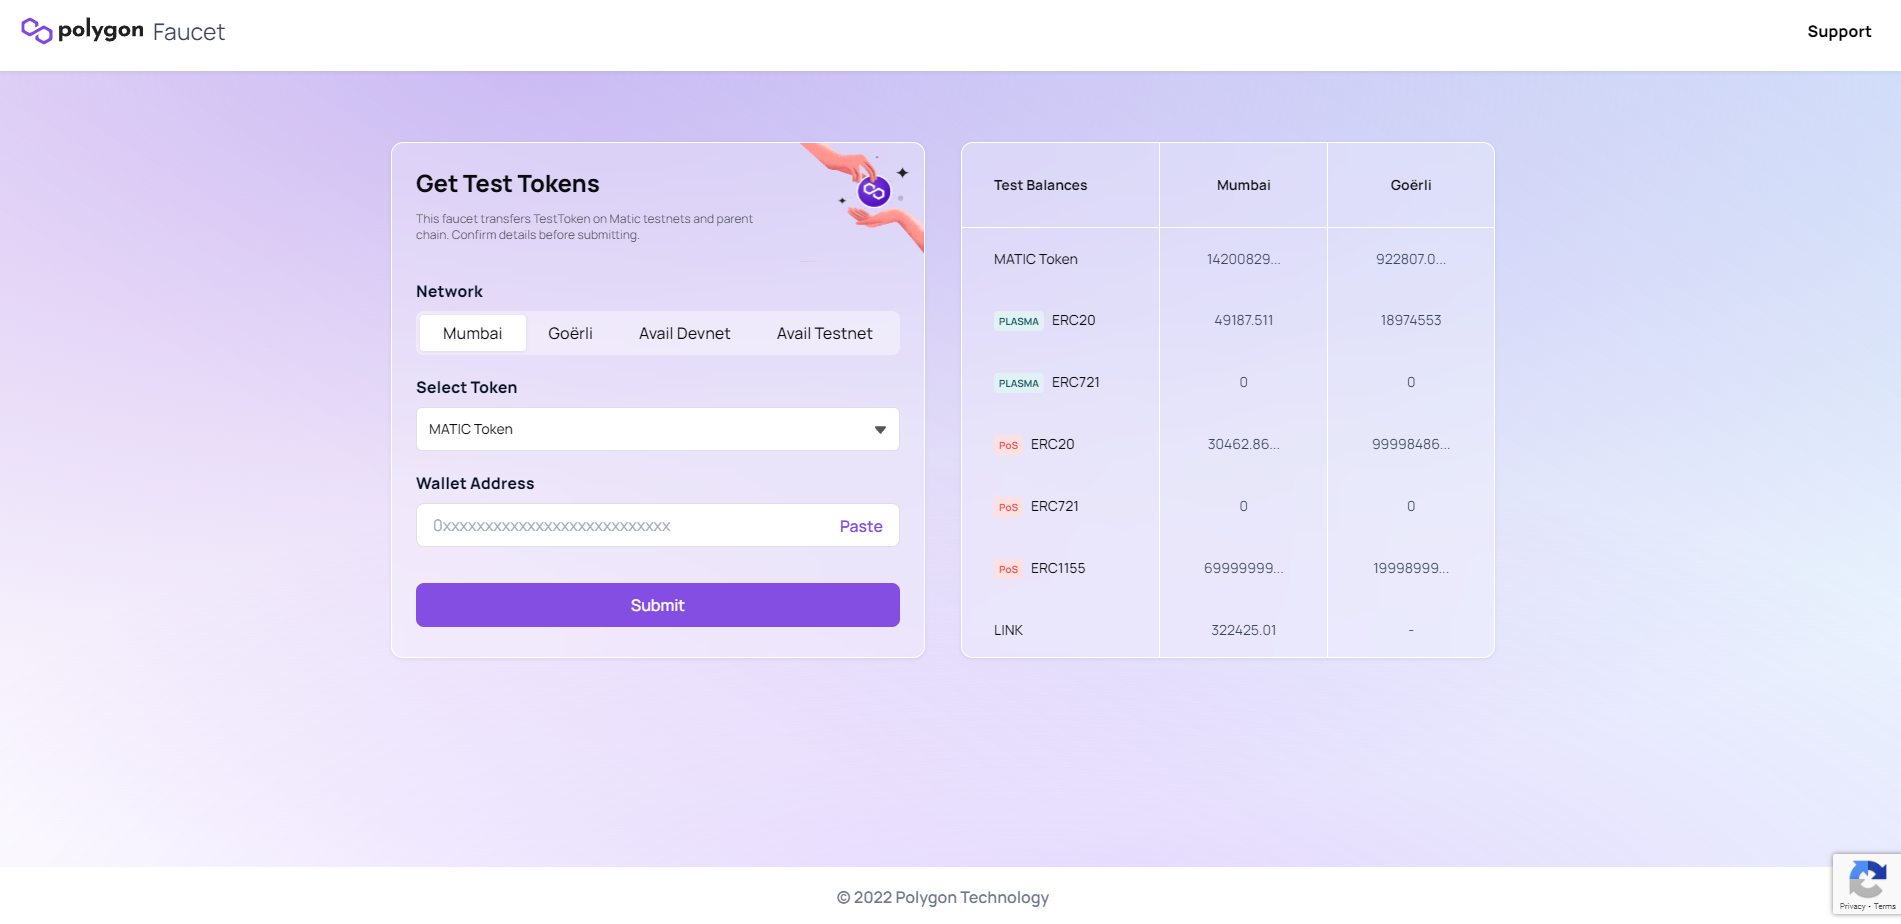
Step 2: Fund your wallet
Visit the appropriate faucet to the testnet depending on the chain:
For example, Polygon: https://faucet.polygon.technology/
- Mumbai
- Select MATIC
- Paste your project wallet address
- You will have to connect to your discord account
- Hit submit
Step 3: Refresh your project and wait up to 5 minutes
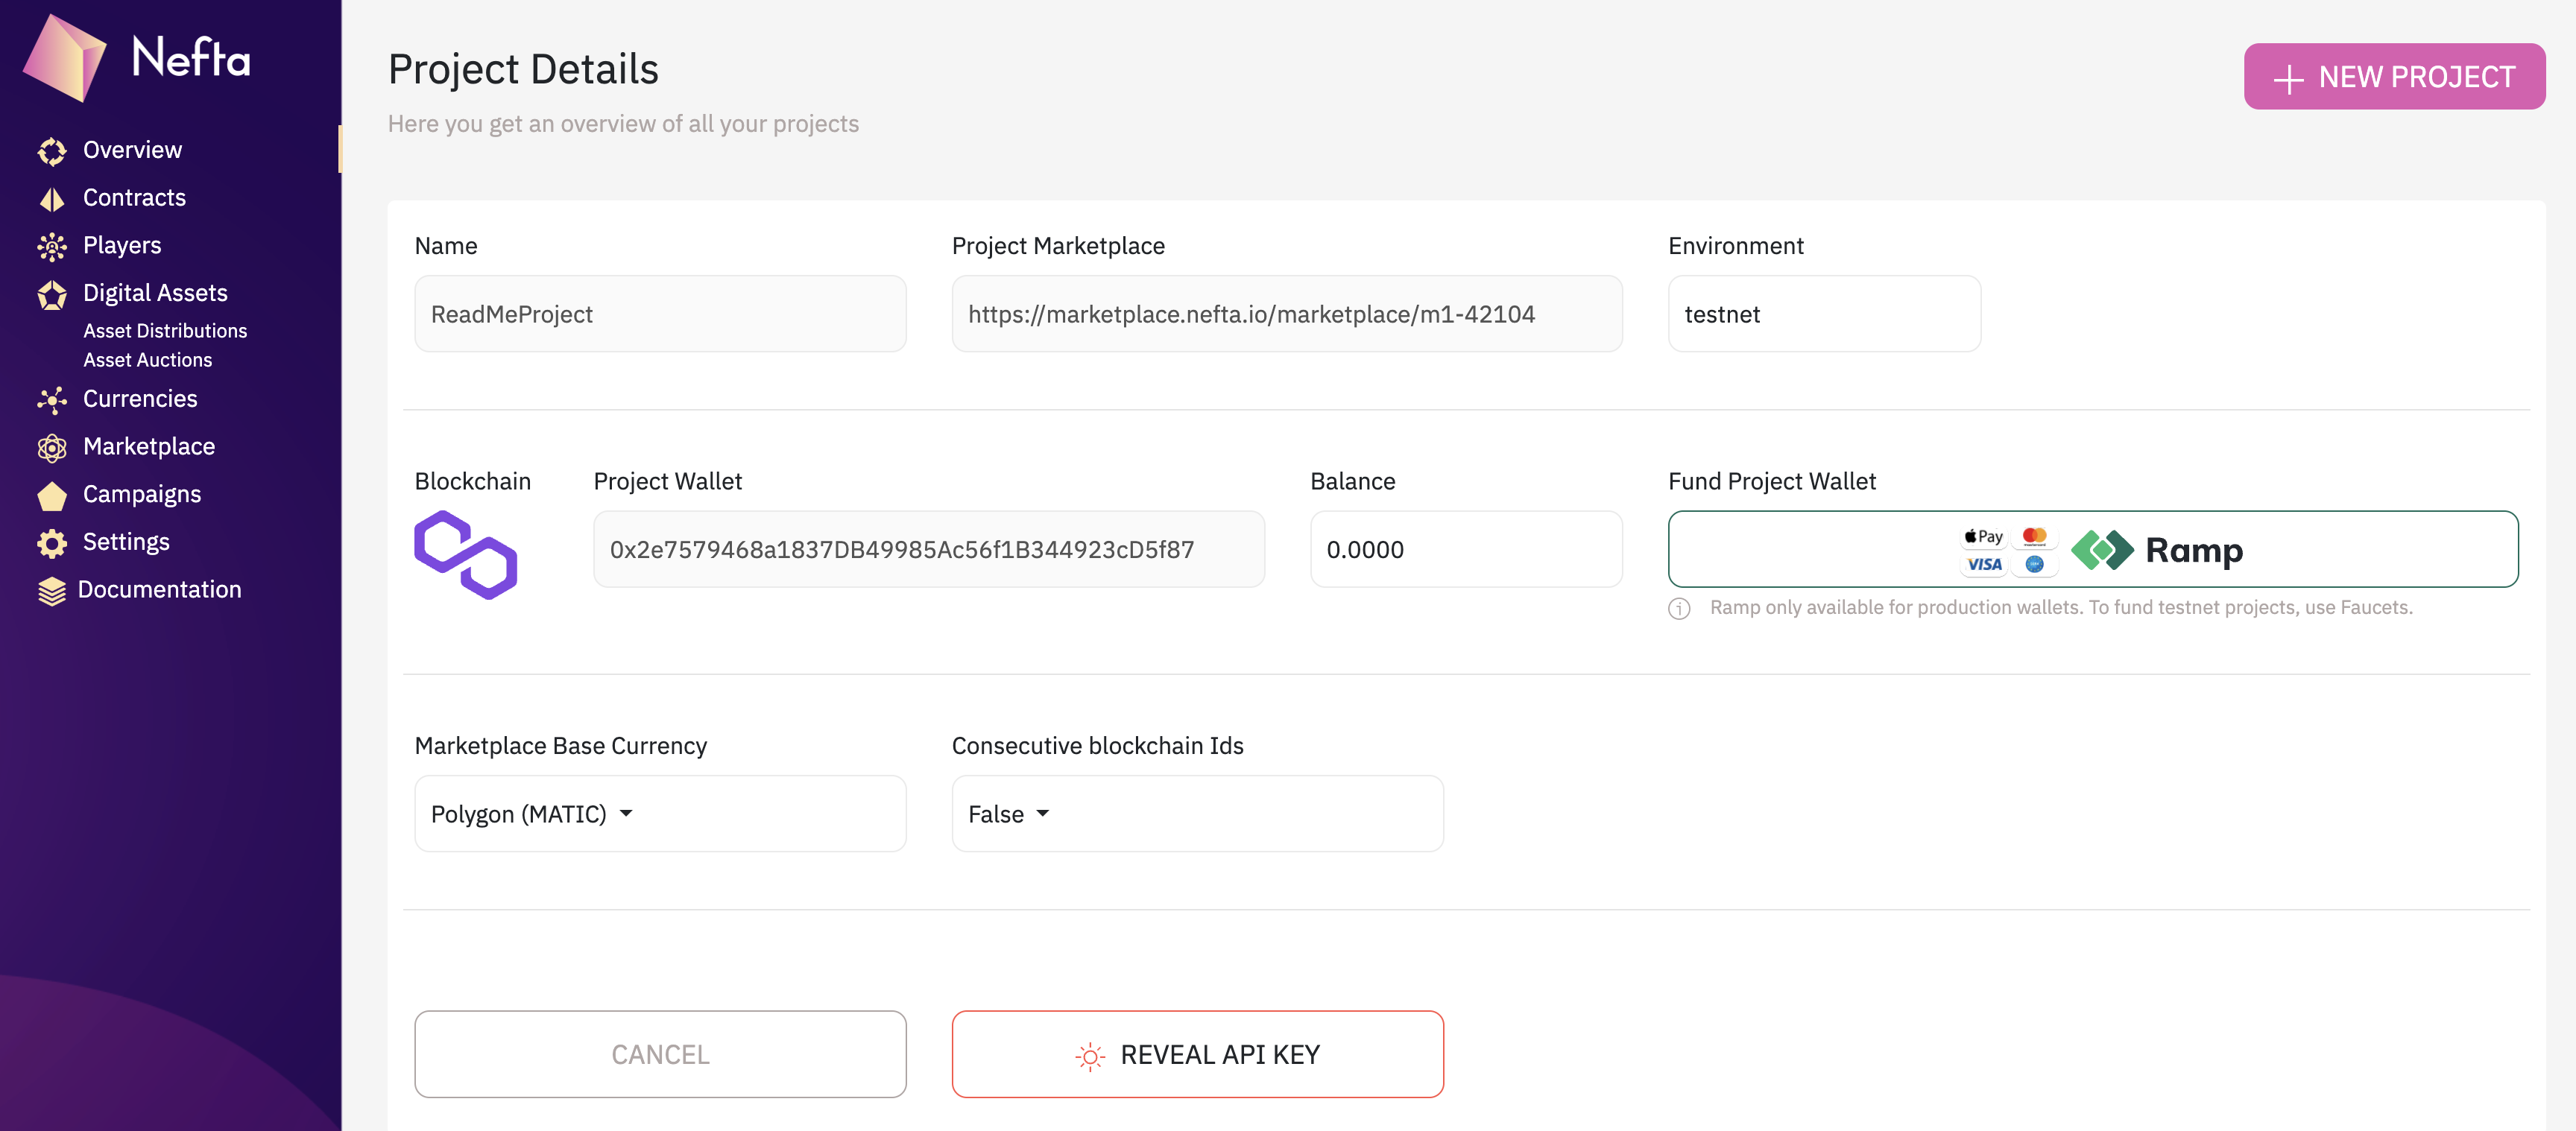
After a few minutes, you'll see your balance increase to 0.2 MATTIC.

Funded, but still need to mint project.
To deploy the project onto the chain you need to go to the contracts page on the left hand menu, and click on 'Deploy to chain'. After a few minutes the status should change from 'Ready for Deployment' to 'Contract Deployed'. Your contract address will also appear.
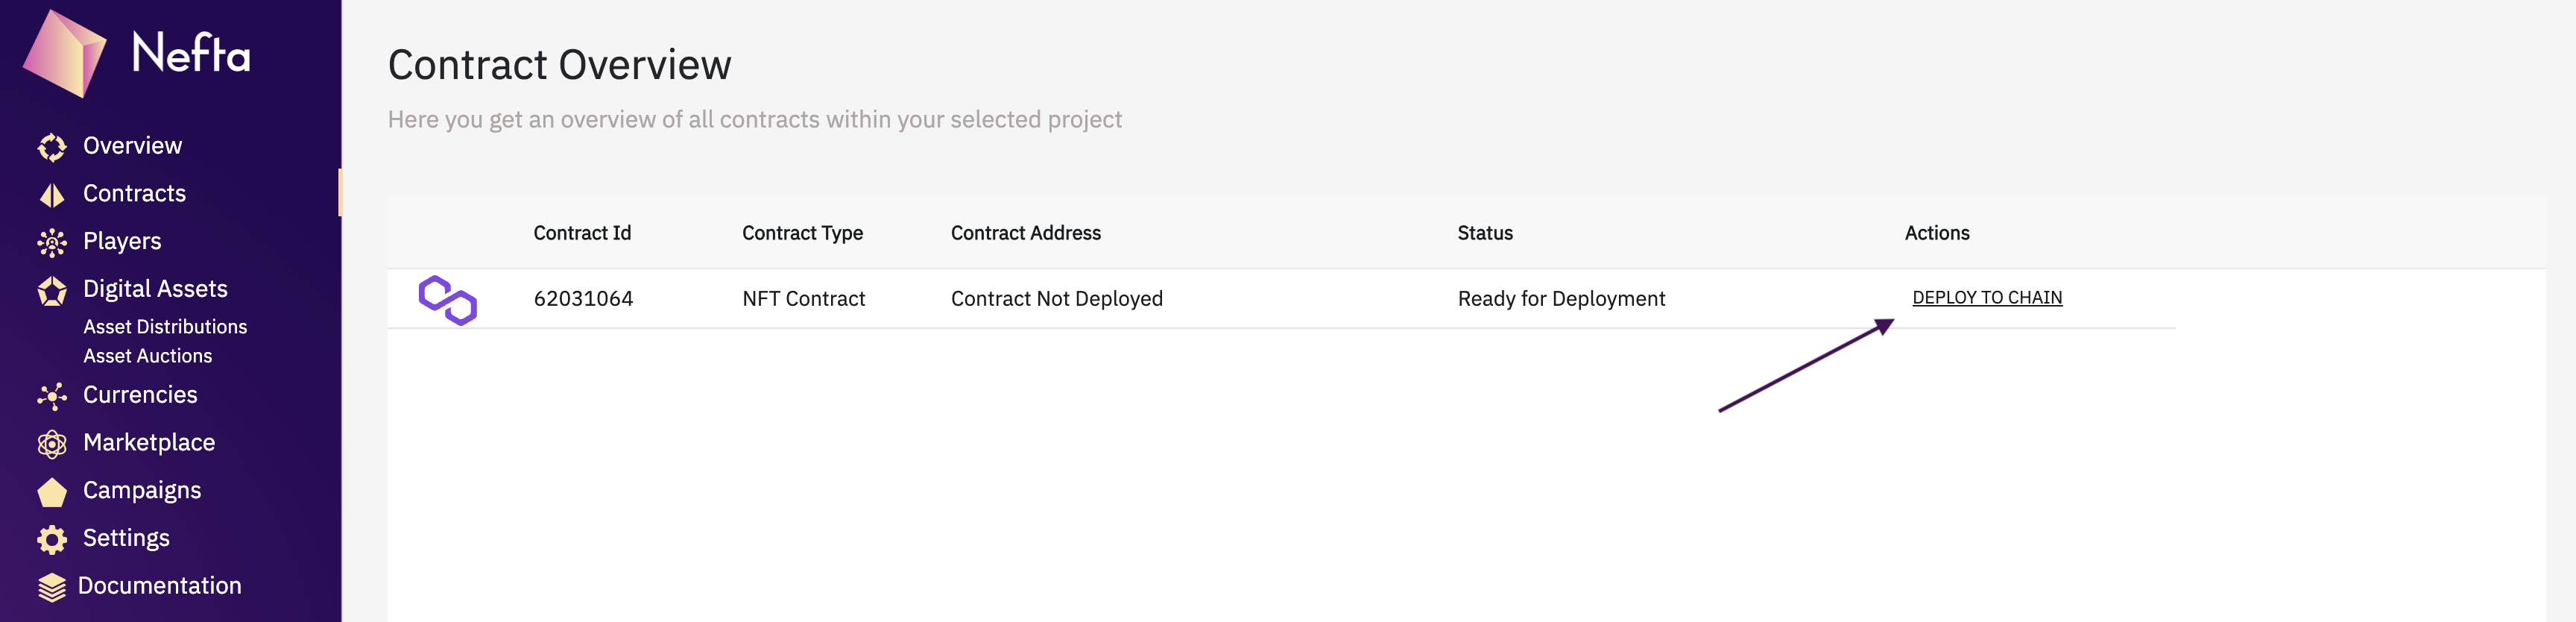
Status 'Ready for Deployment'
Ready to go!
All good and ready to test on testnet!
Your project has been created, funded, and minted on chain.
Now you can use the following guides to create assets, gift or rent to wallets/users, test the marketplace, and more - all on a live blockchain testnet.
Don't hesitate to reach out to our team if you have any issues!
Updated 9 months ago